

How To Get Started With Facebook Ads
Facebook Ads can be daunting. If you manage a Facebook page, sharing content to be notified with likes and shares from happy followers is surely satisfying. But how do I graduate for this and start reaching new people for my business? While a personal Facebook account is easy and accessible, the Facebook’s Business Manager can be a tad overwhelming and inaccessible at times. Where do I start? How do I start?
The benefits of advertising on Facebook are they’re immediate, so you’ll be in front of an audience much sooner than with an organic campaign. The social network has a two billion monthly users worldwide, ready to find you. We could explain to you how Facebook advertising can help, but rather this article is going to show you where to start with seven simple steps.
Step 1: Decide on Goals
This is life advice. If you want to work towards achieving anything, figure out what that anything is before you act. Proclaiming ‘I want more business’ is too vague. The more specific you are, the easier it is to plan our how to get there. Defined goals leads to defined planning.
Tell people around you what your goal is. Articulate it. Write it down. This way, you’ll know what you’re after and then you can build a campaign to meet this. Facebook helps with this by providing options: generate new leads, drive traffic to a website, event attendance, etc. Choose one and then move onto the next step.
Step 2: Log in to Facebook Ads and Hit Create
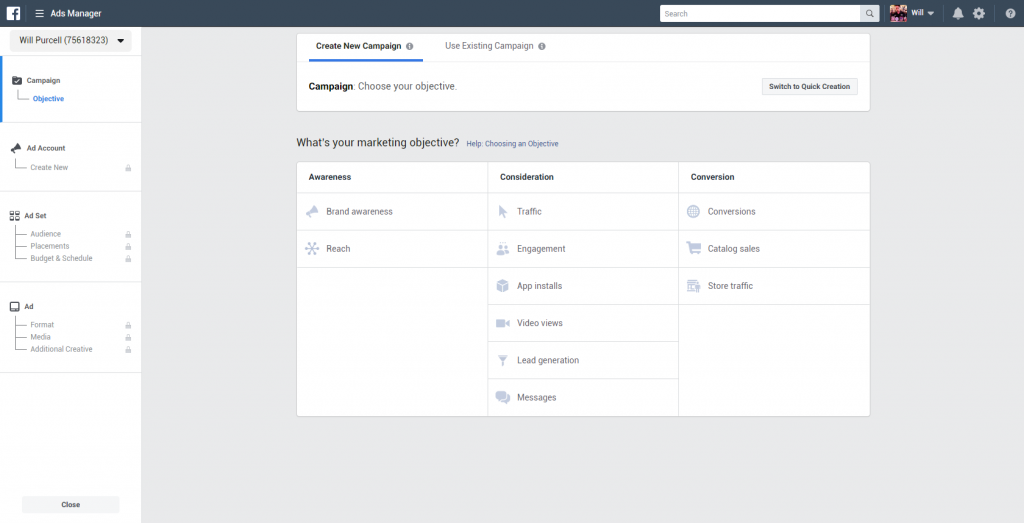
Click here. Otherwise, you can find Facebook’s Ads Manager on your Facebook page. On the top right drop-down menu. Click around the page and familiarise yourself with the lay-out. Awareness, Consideration, Conversion may seem confronting, but these terms are your here to help you. Pick the option which relates most to the goal you should have already decided upon. This is your ‘marketing objective’.
When you’re ready, click ‘Create’. You can choose either a guided creation in which Facebook will help, or a quick creation. We recommend a guided creation if this is your first time.
Step 3: Pick an Audience
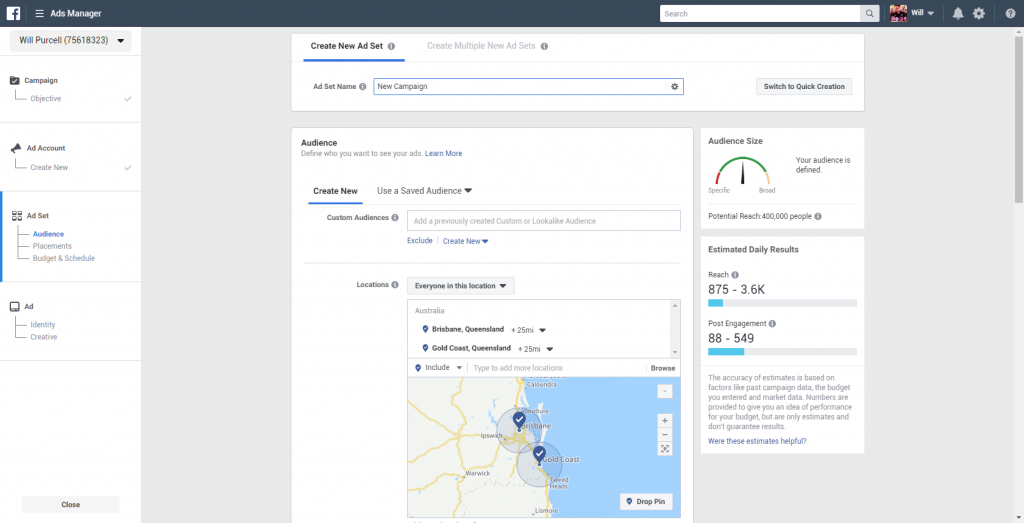
After you’ve chosen an objective, you’ll have to choose a target audience. Where are your customers located? What age are they? Facebook needs as much information as possible to make the ad as targeted as possible.
You can hone your ideal customer profile down. If you don’t know who your target audience is, then find out. If you have a website, its login homepage will usually have information on who is visiting your website. An email survey can also give your valuable insights. After all, there is no point advertising to someone who is not interested in what you have to offer. So select these people. For people who are more advanced, you can delve into custom or lookalike audiences after.
Step 4: Set A Budget
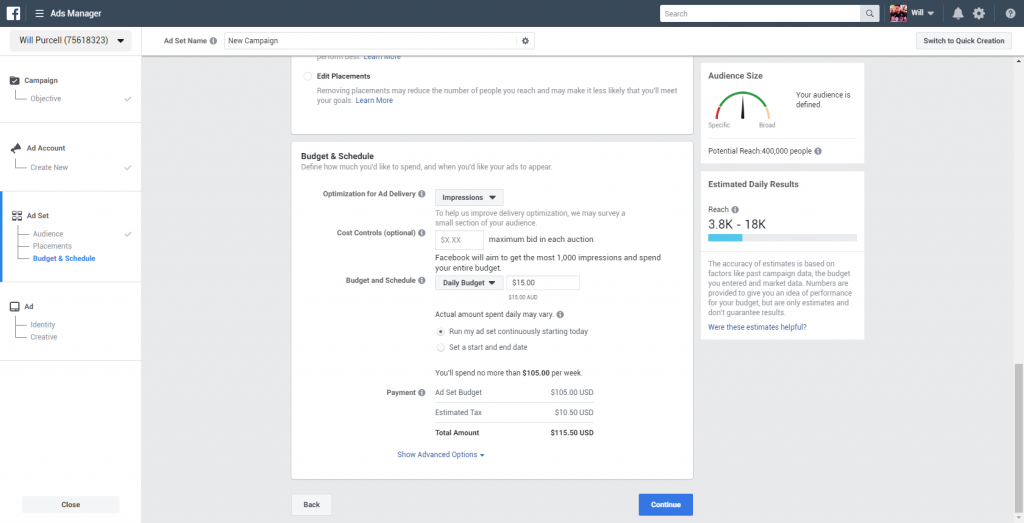
A budget is the financial limit you want to set on your campaign. This can be set to ‘daily’, to spread out the campaign over weeks if possible. Or, it can be ‘lifetime’. A lifetime budget will allow your campaign to spread as long as there are funds available. This option is for high exposure. If you’re having a sale, or promoting anything that is time-sensitive, lifetime is the go-to budget.
However, if you want a steady stream of your ads popping up in potential customer’s feeds, then choose daily. You can also tweak around with additional setting to fine-tune how much money you’re spending.
Step 5: Design Your Ad
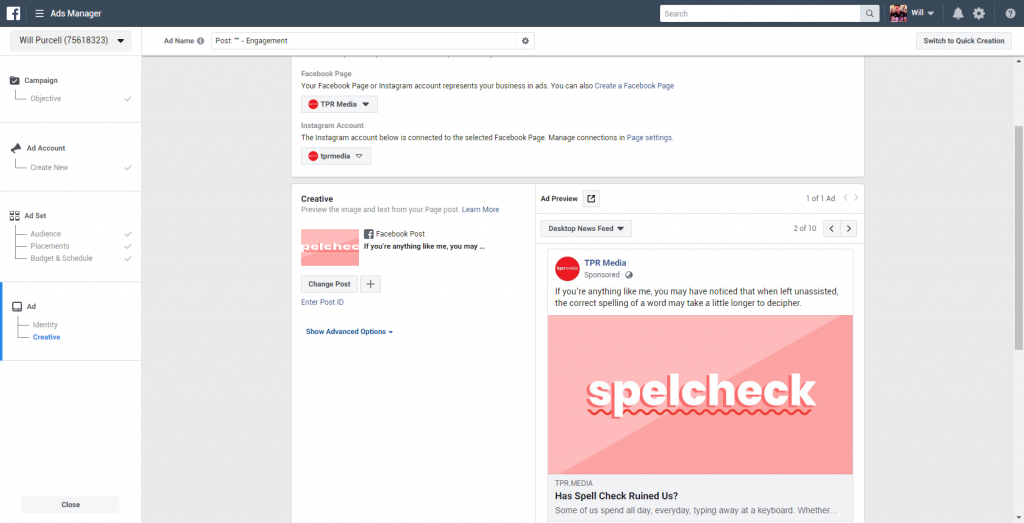
Now, craft the ad. Choose an image, write the message and select what type of screen you want the ad to appear on. Do you want desktop of mobile? Are your customers sitting in an office or out catching up with friends over coffee? There is a range of ad types too: carousel ads, single image, single video. The list goes on. All these options tailor the ad so the content is made available to viewers in the best possible way.
If you’re fretting, don’t. A digital marketing agency like us can conduct research on your behalf to discover customer habits of which you may have not been aware.
Step 6: Finalise
You’re nearly there! Review the ad with a fine-tooth comb. Any mistakes will look sloppy and unprofessional. If it reads, looks, or sounds absolutely wonderful, hit the submit button and wait. Facebook reviews all ads to ensure they’re appropriate for the network. Facebook will notify you once is has been approved and is up live, appearing on would-be customer’s feeds.
Step 7: Wait
Your ad is now out there in the world, among all the other ads, vying for attention. If you followed each one of these steps, then it should at the very least be catching some of that newsfeed spotlight. If you’re curious about delving into the world of Facebook Ads manager and want a helpful hand with any of these steps, contact us today.
If you’d like to read more about the internet, technology and marketing, sign up to our monthly newsletter Red Alert which rounds up all our blog posts for you and puts them neatly in your inbox.
[mc4wp_form id=”1250″]